

Essential Guide to the Big 3 Upgrade: Boost Your Car's Performance
Posted by Jacob Morris on Jun 1st 2024
Essential Guide to the Big 3 Kit: Boost Your Car's Performance
The Big 3 Upgrade: How to Fix Voltage Drop, Stop Lights Dimming, and Improve Car Audio Performance
If you’re upgrading your car audio system or adding high-demand electrical accessories, the Big 3 upgrade—also known as a big 3 wiring upgrade—is one of the most important electrical improvements you can make. It directly addresses common problems like voltage drop, lights dimming, and inconsistent amplifier performance by strengthening your vehicle’s main electrical connections. For those looking for a complete solution, a big 3 wiring kit or wiring kit is available, providing all the necessary cables and components for a straightforward installation.
Many people jump straight to bigger amplifiers, extra batteries, or a high-output alternator without fixing the real bottleneck: factory electrical wiring. The stock electrical system, including the OEM wiring (often 6 gauge), is typically not designed to handle the increased power demands of aftermarket accessories and equipment, which can lead to voltage drops and restricted power flow. The big 3 wiring upgrade is especially important for supporting high-demand equipment. The Big 3 upgrade solves that problem at the source.
This guide explains what the Big 3 upgrade is, when you should upgrade your electrical, what tools you need, and how to do the Big 3 upgrade step by step; the right way. It’s just a matter of replacing a few key wires to significantly improve your vehicle’s electrical performance.

What Is the Big 3 Upgrade?
Big 3 upgrade improves your vehicle’s electrical system by upgrading the three primary high-current paths using larger-gauge, lower-resistance wiring. Factory wiring is designed for stock loads, not modern car audio systems, aftermarket lighting, or other power-hungry accessories.
The three upgraded connections are:
-
Alternator positive → Battery positive
-
Battery negative → Vehicle chassis (commonly referred to as the battery ground or battery to the frame)
-
Engine block → Vehicle chassis
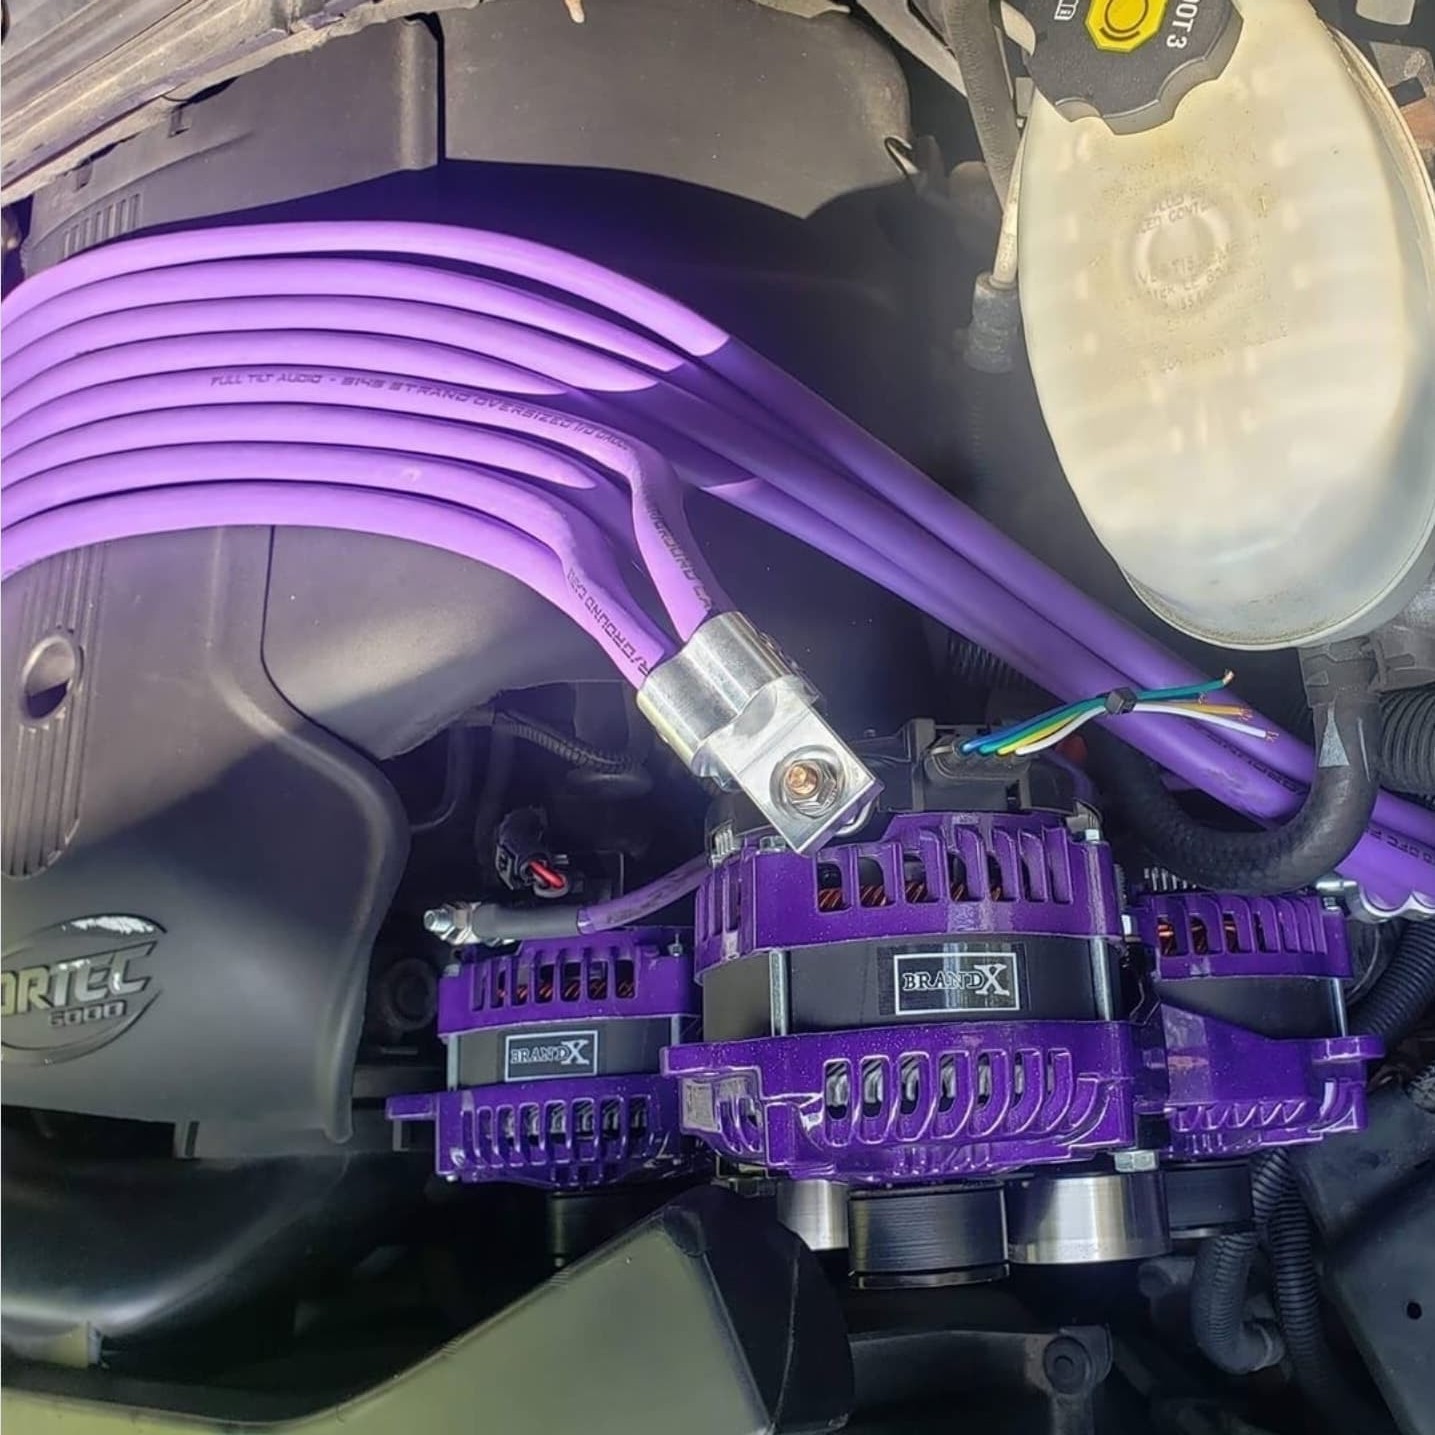
The Big 3 upgrade involves adding a new cable alongside the existing cables, enhancing the main wires that connect the battery, alternator, frame, and engine block. Upgrading these circuits with upgraded wires reduces resistance and improves performance. These main wires are critical for improved current flow and overall electrical performance.
Important: The factory wires are not removed. The Big 3 upgrade adds heavier wire alongside them to improve current flow.
The “Big 4” Upgrade (Recommended Extra Step)
Through real-world testing, we also recommend adding one additional ground:
-
Alternator bracket → Battery negative
Adding an engine ground strap or alternator ground, similar to the OEM ground strap, further enhances system stability and reduces resistance.
This extra step further reduces resistance at the alternator and improves charging stability, especially on higher-power systems. While not required, it consistently improves results.
Why the Big 3 Upgrade Matters
Upgrading these electrical paths provides several major benefits:
By upgrading the vehicle's electrical system, you increase current capacity and can support a bigger battery, which is essential for powering high-demand accessories and aftermarket components.
Reduces Voltage Drop
Undersized factory wiring creates resistance under load. The Big 3 upgrade significantly reduces voltage drop, especially during heavy bass hits.
Stops Lights Dimming
Headlights dimming when the bass hits is a clear sign of electrical strain. A properly installed Big 3 upgrade often eliminates lights dimming entirely.
Improves Car Audio Performance
Amplifiers deliver cleaner, more consistent power when voltage remains stable, resulting in better sound quality and output.
Extends Electrical Component Life
Lower resistance means less heat and stress on batteries, alternators, and wiring.
When Should I Upgrade My Electrical with the Big 3?
You should strongly consider a Big 3 upgrade if:
-
Your system produces 1,000 watts RMS or more
-
You’re installing or running a high-output alternator
-
You experience voltage drop or dimming lights (customers who notice these issues are the most likely to benefit)
-
You’re upgrading batteries (AGM or lithium)
-
You plan future electrical or car audio upgrades
In many cases, the factory grounds and wiring are sufficient for most vehicles, but the Big 3 upgrade becomes necessary when adding high-demand accessories or if you encounter electrical issues due to poor connections or corrosion.
Installation may vary depending on your specific vehicle and its electrical layout, as universal kits may not perfectly fit all models. Customizing the installation for your vehicle type ensures proper grounding and performance.
Adding a second battery or upgrading the stock alternator may also require a Big 3 upgrade to ensure optimal electrical performance and system stability.
The Big 3 upgrade should always be your first electrical upgrade, before adding extra batteries or upgrading your alternator.

Tools & Materials Needed for the Big 3 Upgrade
We offer complete Big 3 kits, but if you’re doing it yourself, here’s everything you’ll need.
-
High-quality cables (preferably 100% oxygen free copper) for optimal conductivity and minimal resistance.
-
Cable sizes: 1/0 AWG or 4 AWG are recommended; remember, the diameter of the cable directly affects its current capacity.
-
Lugs, ring terminals, and heat shrink tubing.
-
Wire cutters, crimpers, and a wrench set.
Note: Big 3 kits and supplies can be purchased online, and many orders are shipped sooner than expected.
Wiring & Supplies
-
1/0 AWG or 4 AWG power cable (depending on system power)
-
Copper lugs or ring terminals matched to wire size
-
Heat shrink tubing
-
Battery terminals (correct post size)
-
Fuse (correctly rated for your system) & fuse holder
-
Zip ties
-
Electrical tape
Tools
-
Wire cutters rated for large-gauge wire
-
Wire strippers
-
Heavy-duty crimpers
-
Solder and soldering iron (recommended)
-
Heat gun
-
Digital multimeter (DMM)
-
Standard hand tools (wrenches, sockets, screwdrivers)
A fuse should be installed near the battery or fuse box to protect your electrical system during the Big 3 upgrade.
How to Do the Big 3 Upgrade (Step by Step)
Step 1: Plan Your Wiring Routes
With the hood open, plan your wire routing carefully:
-
Avoid belts, pulleys, fans, and moving parts
-
Avoid exhaust and high-heat engine components
-
Choose solid mounting points that won't vibrate
Good routing prevents failures later.
Step 2: Disconnect the Battery
Park the vehicle safely, allow the engine to cool, and disconnect the negative on battery (negative terminal) first.
Step 3: Measure & Cut the Wire
Lay the power wire along each planned route:
-
Measure and cut the power wire to the correct length for each connection, leaving an extra 1–1.5 inches for stripping and terminals
-
Cut all required sections of power wire before installing
Step 4: Prep the Cables
Best Method: Soldered Copper Lugs
-
Heat the lug and add solder
-
Insert the wire while solder is molten
-
Ensure no exposed strands
-
Seal with heat shrink tubing
Alternate Method: Crimped Terminals
-
Use a proper heavy-duty crimper
-
Tug test each connection
-
Seal with heat shrink tubing
Step 5: Install the Big 3 Wiring
Install in this order:
-
Battery negative → Chassis (connect to the negative battery post)
-
Engine block → Chassis
-
Alternator bracket → Battery negative (extra step, connect to the negative battery post)
-
Alternator positive → Positive battery post (use a positive wire from the alternator's positive stud to the battery's positive post; ensure a solid, clean connection. Avoid using a plug or unnecessary extra wires, as a direct, secure connection is more effective.)
You may need to remove the battery tray to access the connection points. You can add new cables alongside existing cables or replace them as needed.
Factory wiring can remain in place or be replaced, both methods work.
Step 6: Secure the Wiring
-
Zip-tie wiring every 12 inches
-
Secure to non-moving, non-hot surfaces
-
Ensure wires cannot rub or shift
Step 7: Test the Electrical System
Charging Voltage Test
Using a DMM:
-
Normal charging range: 13.6V – 14.8V
Ground Resistance Test
-
Set DMM to ohms (Ω)
-
Battery negative → Chassis
-
Alternator positive → Battery positive cable end
Readings under 1 ohm indicate a solid connection.
If resistance is high:
-
Clean ground points to bare metal
-
Remove corrosion
-
Retest
Special Note: Big 3 Upgrade on RVC Vehicles (GM & Modern Cars)
Many newer vehicles; especially GM, use RVC (Regulated Voltage Control) systems.
What Is RVC?
RVC is a smart charging system that uses a current sensor on the factory negative battery cable to control alternator output for fuel efficiency.
How to Do the Big 3 on RVC Vehicles
-
DO NOT remove or bypass the factory negative cable
-
Your new Big 3 ground wire runs alongside the factory cable
-
The RVC sensor must remain on the original negative cable
Goal
This allows improved current flow for high-power car audio systems without confusing the charging system, preventing voltage drop and lights dimming while keeping the vehicle happy.
Common Big 3 Upgrade Mistakes to Avoid
-
Using undersized wire
-
Poor or painted ground points
-
Skipping proper cable termination
-
Not testing voltage and resistance
-
Incorrect RVC grounding on modern vehicles
-
Improper installation can void warranty information or coverage
Final Thoughts: Is the Big 3 Upgrade Worth It?
Absolutely. The Big 3 upgrade is one of the most effective and affordable ways to improve your vehicle’s electrical system, eliminate voltage drop, stop lights dimming, and protect your car audio investment.
If you plan to push your system harder now, or in the future, the Big 3 upgrade is the foundation that makes everything else work correctly.
Do it once. Do it right.
If you have any questions feel free to reach out.
Written By
Jacob Morris
Electrical Specialist & Co-Owner at Amped Up Car Audio